Creating a Class Schedule Using Excel
1.
Open
Microsoft Excel.
2.
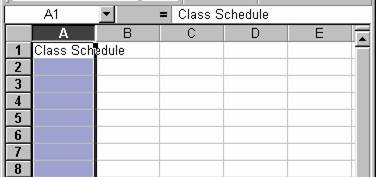
In cell
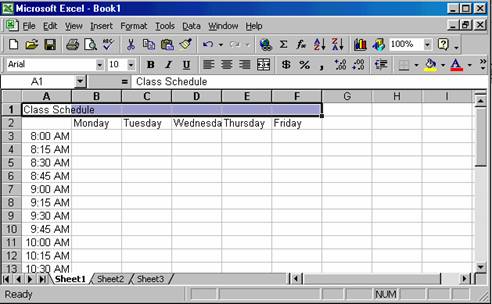
A1 and type in “Class Schedule.”
3.
Select
all of column A by clicking on the gray “A” box at the top of the worksheet.
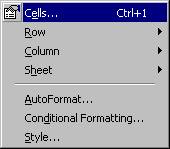
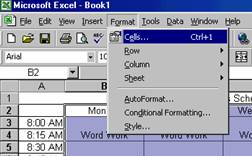
 Go
up to “Format,” “Cells.”
Go
up to “Format,” “Cells.”

Under the “Number”
tab, click on “Time”, and then under “Type,” click on “
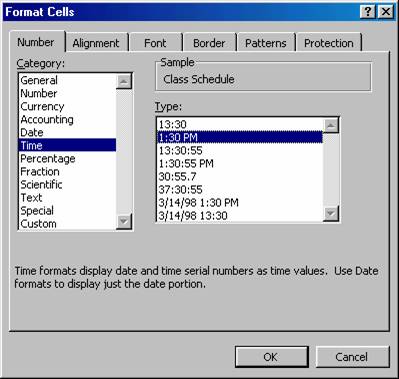
 Click “OK.”
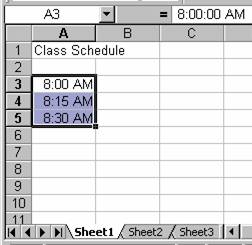
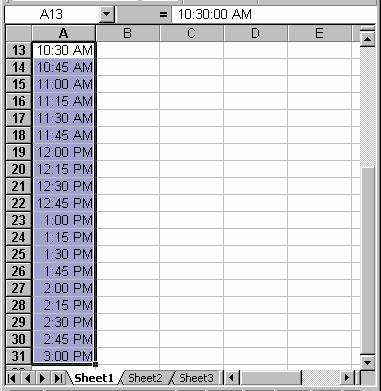
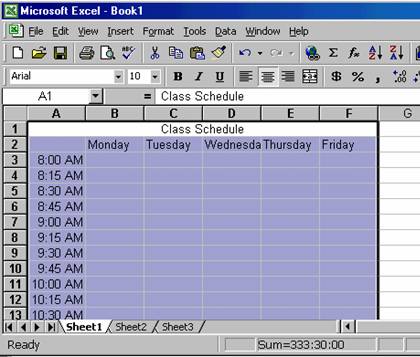
3. Begin your table by creating time
intervals in column A. I usually use
15-minute intervals. Type
in at least three different times.

4. Once you have three times entered, you can
let the computer do the rest of the work.
Select the three times, and move your arrow to the small box in the
lower right-hand corner of the box.
Click and drag until you have reached the end of the day.
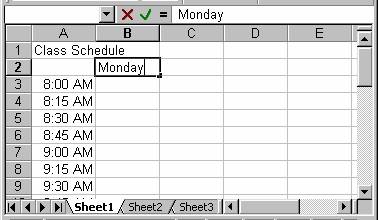
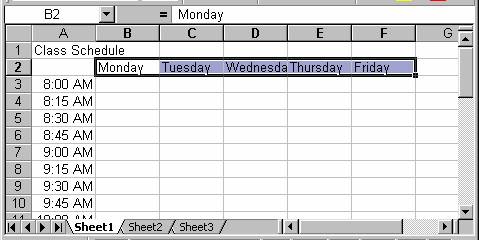
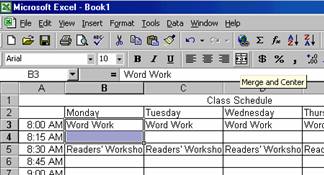
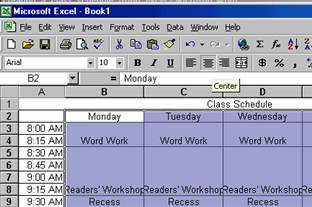
5. Now click on cell B2. Type in “Monday.”
Click on the lower
right-hand box and drag until you have all the days of the week.
6.
Center
your title by selecting cells A1-F1.
Click on the “Merge and Center” button.

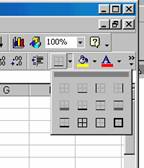
7. Now you can create the lines on your
schedule. Select all of the cells that
you wish to divide with borders. Click
on the “Borders” button and select “All Borders.”
8. Now, select columns B-F by clicking and
dragging on the gray boxes above the chart.
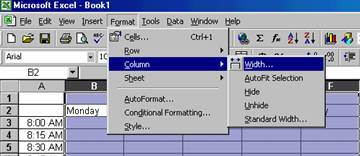
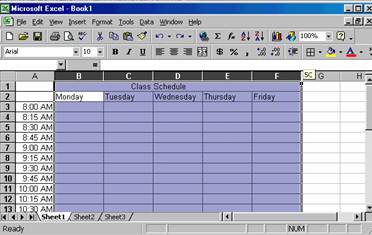
Go up to “Format,”
“Column,” “Width.”
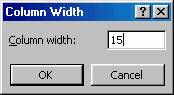
Key
in “15,” and click “OK.”
9. Now you can enter your class
schedule. Be sure to type in the cell in
which the class starts.
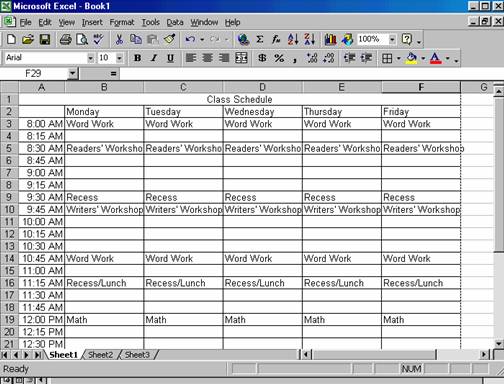
10. Next, select two cells that you want to
combine into one class.
Click on the “Merge and Center” button.
Continue
doing this for all of your classes.
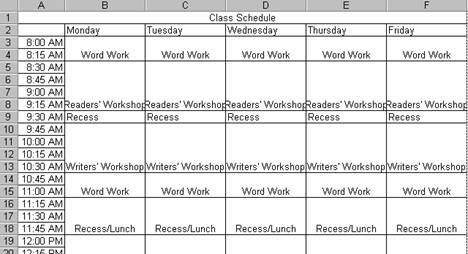
11. Now, select the all of the cells that
contain the days and classes.
Click the “center”
button.
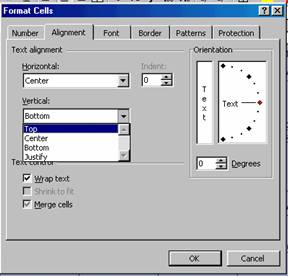
Now click “Format,”
“Cells.” Choose the “Alignment” tab and
under vertical, select “Top.” Also make
sure to check the box next to “Wrap text.”
12. Now you can make the schedule easier to read
by color coding some of the classes. (Recess,
lunch, and specials) Select the cells
that you want to change the color of and click on the arrow next to the “Fill
Color” button. Choose your color and
continue doing this with any classes you wish.

